How to Repair Rattan Furniture: A Comprehensive DIY Guide
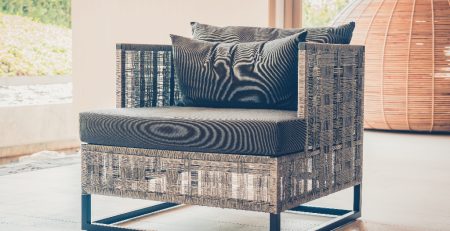
Rattan furniture is known for its natural beauty and durability, making it a popular choice for both indoor and outdoor spaces. Over time, however, even the sturdiest rattan furniture might show signs of wear and tear. But don’t worry and repair rattan furniture with ease using this guide.
In this guide, we’ll walk you through the steps to effectively repair various types of rattan furniture, whether it’s plastic, garden, outdoor, or patio furniture.
How to Repair Rattan Furniture?
Begin by thoroughly examining the damaged rattan furniture. Identify any broken or loose strands, cracks, or missing pieces. This assessment will help you plan your repair approach and gather the necessary materials.
Gather Your Materials
Depending on the type of damage, you might need materials such as replacement rattan strands, epoxy adhesive, clamps, sandpaper, varnish, and a small paintbrush.
Repairing Broken Rattan Strands
- If you have broken rattan strands, carefully remove any loose pieces.
- Measure and cut replacement rattan strands to match the size of the broken ones.
- Apply epoxy adhesive to the ends of the replacement strands and the area where they broke off.
- Press the replacement strands onto the broken ends and hold them together using clamps until the adhesive dries.
Fixing Cracks
- Gently sand the cracked area to create a smooth surface.
- Apply epoxy adhesive to the crack and press the sides together.
- Wipe off any excess adhesive and let it dry. Sand the area again for a seamless finish.
Replacing Missing Rattan
- Measure the size of the missing rattan piece.
- Cut a replacement strand slightly longer to allow for trimming.
- Attach one end of the replacement strand using epoxy adhesive and weave it into the existing rattan pattern.
- Secure the other end with adhesive and trim any excess.
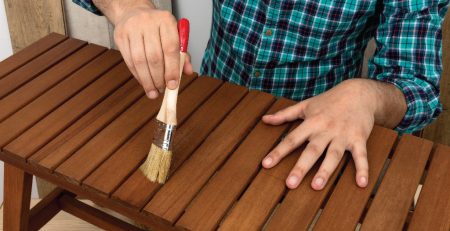
Finishing Touches
Sand the repaired areas to ensure they’re smooth and even. Apply a thin coat of varnish using a small paintbrush to match the color of the surrounding rattan. This will protect the repaired area and maintain a consistent appearance.
Caring for Repaired Rattan Furniture
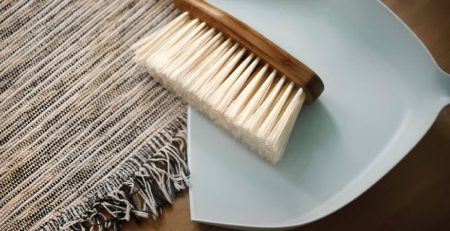
Avoid exposing repaired rattan furniture to extreme temperatures or excessive moisture. Regularly clean your furniture with a soft cloth to prevent dust buildup.
Apply a furniture wax or oil to maintain the rattan’s natural luster.
How to Repair Rattan Patio Furniture
Repairing rattan patio furniture involves assessing the damage to identify broken strands, cracks, or missing pieces. Begin by removing loose fragments and replacing broken strands with measured replacements secured using epoxy adhesive.
For cracks, sand the area, apply adhesive, and let it dry before sanding again for a seamless finish. Replace missing rattan by weaving in a slightly longer replacement strand and securing it with adhesive. Finish by sanding, varnishing, and caring for the repaired areas to maintain the furniture’s beauty and functionality.
How to Repair Plastic Rattan Garden Furniture
To repair plastic rattan garden furniture, inspect the damage and gather materials like replacement strands, epoxy adhesives, clamps, and sandpaper. Repair broken strands by cutting and attaching replacement pieces with epoxy adhesive and clamps. For cracks, sand and mend with epoxy, followed by sanding for a smooth finish.
To replace missing plastic rattan, measure, cut, and weave a replacement strand, securing it with adhesive. Complete the repair with sanding and varnishing, ensuring your garden furniture maintains its durability and aesthetic appeal.
How to Repair Rattan Outdoor Furniture
Repairing outdoor rattan furniture involves careful assessment and necessary materials such as epoxy adhesive, replacement rattan strands, and varnish. Fix broken strands by applying adhesive to replacement strands and the broken ends, securing them with clamps. For cracks, sand the area, apply epoxy adhesive, and sand again for a seamless look.
To replace the missing rattan, attach a replacement strand and weave it into the existing pattern before securing it with adhesive. Finish with sanding and varnishing to protect the repaired areas and preserve the outdoor furniture’s longevity and charm.
Conclusion
With a little patience and the right tools, repairing rattan furniture is a manageable DIY task. Whether you have broken plastic rattan garden furniture or outdoor rattan patio furniture, following these steps will help you extend the life of your cherished pieces. Remember, well-maintained rattan furniture can continue to bring beauty to your spaces for years to come.
Frequently Asked Questions
Q1: How to repair plastic rattan furniture?
Ans: Repairing plastic rattan furniture involves identifying the damage and gathering replacement strands, epoxy adhesives, clamps, and sandpaper. You’ll need to cut replacement strands, secure them with adhesive and clamps for broken areas, mend cracks with epoxy, and weave in replacement strands for missing sections. After proper bonding, sand and varnish the repaired areas to ensure the furniture’s durability and appearance.
Q2: How to repair rattan garden furniture?
Ans: To repair rattan garden furniture, start by assessing the damage and collecting necessary materials like epoxy adhesive, replacement rattan strands, and varnish. For broken sections, attach replacement strands with adhesive and clamps, fix cracks with epoxy, and replace missing rattan by weaving in replacement strands. Finish with sanding and varnishing to restore your garden furniture’s original charm and strength.
Q3: How to repair broken rattan furniture?
Ans: Repairing broken rattan furniture involves carefully removing any loose pieces, measuring and cutting replacement strands, and using epoxy adhesive to reattach them securely. Clamps may be necessary to hold the pieces together while the adhesive dries. After bonding, sand the repaired area for a smooth finish, and apply a matching varnish to maintain the furniture’s cohesive look.